The Ultimate Homemade Chocolate Lava Cake Recipe (Better Than Any Restaurant)
Chocolate lava cake — also known as molten chocolate cake — is one of those legendary desserts that feels impossibly luxurious yet is surprisingly straightforward to make at home. The magic lies in the contrast: a firm, perfectly baked chocolate exterior that yields to a warm, flowing river of molten chocolate at the center. Once you master this recipe, you will wonder why you ever ordered it at a restaurant for three times the price.
This recipe uses just seven simple ingredients, comes together in about 20 minutes, and can even be prepared ahead of time. Whether you are impressing guests at a dinner party or treating yourself on a Friday night, this is the dessert recipe you will return to again and again.
Why This Lava Cake Recipe Works Every Time
Many home bakers are intimidated by lava cakes because of the timing — too long in the oven and you lose the molten center; too short and the exterior is raw. This recipe has been tested extensively to hit the sweet spot at exactly 12 minutes in a standard oven at 425°F. The key variables are using room-temperature eggs (which incorporate more air) and high-quality dark chocolate (at least 70% cacao for the richest flavor and best flow).
Ingredients (Makes 4 Cakes)
- 115g (4 oz) high-quality dark chocolate (70% cacao or higher), chopped
- 115g (½ cup) unsalted butter, plus extra for greasing
- 2 large eggs + 2 egg yolks, at room temperature
- 100g (½ cup) granulated sugar
- 2 tablespoons all-purpose flour
- 1 teaspoon pure vanilla extract
- Pinch of fine sea salt
Equipment You Will Need
- 4 ramekins (6 oz / 180ml capacity)
- Double boiler or microwave-safe bowl
- Electric hand mixer or stand mixer
- Pastry brush for greasing
Step-by-Step Instructions
Step 1: Prepare the Ramekins
Preheat your oven to 425°F (220°C). Generously butter four 6-ounce ramekins, then dust the inside of each with cocoa powder (not flour — cocoa powder prevents a white coating on the outside of your cake). Tap out any excess and refrigerate until needed.
Step 2: Melt the Chocolate and Butter
Place the chopped chocolate and butter in a heatproof bowl set over a saucepan of barely simmering water (the bottom of the bowl should not touch the water). Stir gently until both are fully melted and combined. Remove from heat and let cool for 5 minutes. Alternatively, microwave in 30-second intervals at 50% power, stirring between each interval.
Step 3: Whip the Eggs and Sugar
In a large bowl, beat the eggs, egg yolks, and sugar together with an electric mixer on high speed for 3 to 4 minutes until the mixture is thick, pale, and falls from the beaters in thick ribbons. This step is crucial — the air you incorporate here gives the cake its structure.
Step 4: Combine
Gently fold the melted chocolate mixture into the egg mixture using a rubber spatula. Use wide, slow strokes to preserve the air you have whipped in. Add the vanilla extract and salt, then sift in the flour and fold until just combined. Do not overmix.
Step 5: Fill and Chill (or Bake Immediately)
Divide the batter evenly among the prepared ramekins, filling each about three-quarters full. At this point, you can refrigerate the ramekins for up to 24 hours. If baking from chilled, add 2 to 3 minutes to the baking time.
Step 6: Bake
Bake for exactly 12 minutes at 425°F. The edges should be set and pulling slightly away from the ramekin sides, but the center should have a very slight jiggle. Remove from the oven and let rest for 1 minute.
Step 7: Unmold and Serve
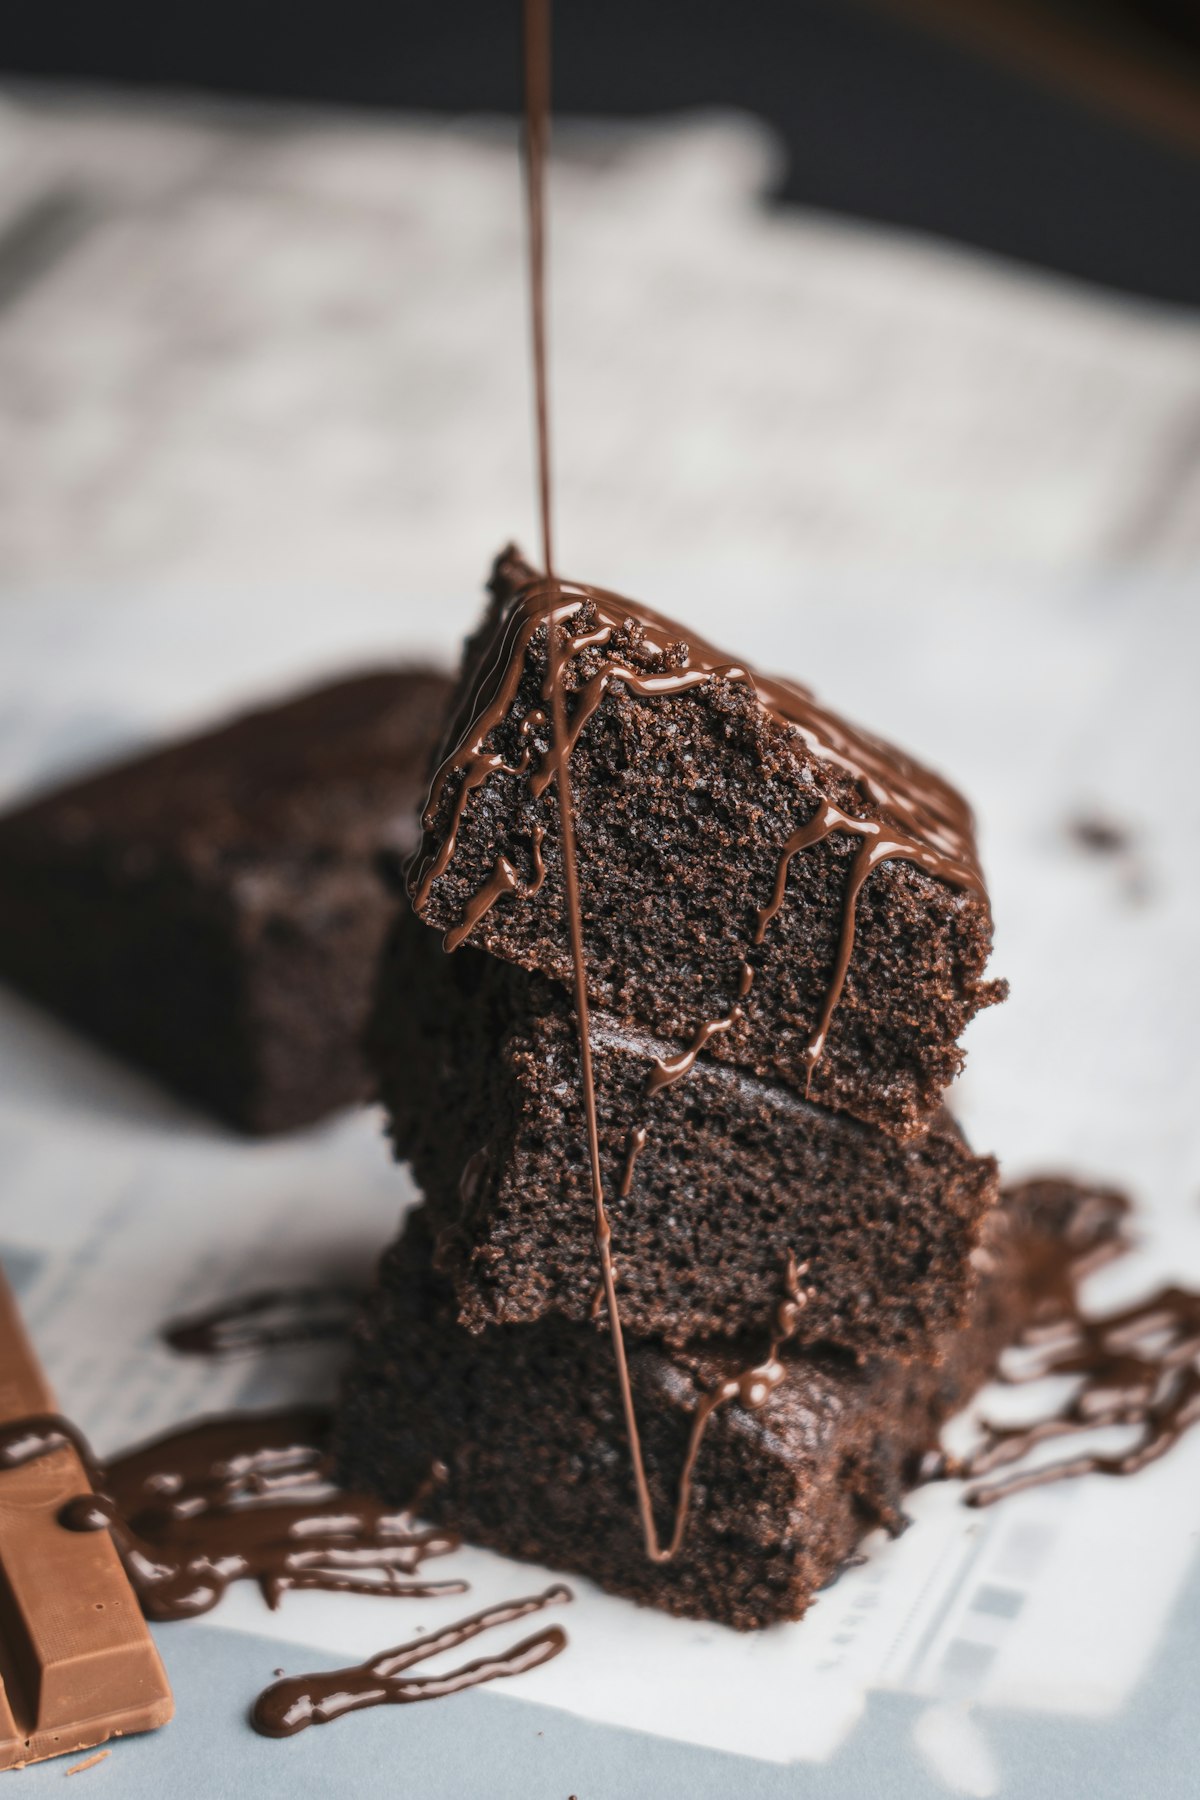
Run a thin knife or offset spatula around the edge of each ramekin. Place a dessert plate on top, then swiftly invert. The cake should release cleanly. Serve immediately with a scoop of premium vanilla bean ice cream, a dusting of powdered sugar, and fresh raspberries if desired.
Troubleshooting Common Problems
| Problem | Cause | Solution |
|---|---|---|
| No molten center | Overbaked | Reduce time by 1–2 minutes |
| Raw batter pours out | Underbaked | Increase time by 1–2 minutes |
| Cake sticks to ramekin | Insufficient greasing | Butter generously + dust with cocoa |
| Flat, dense texture | Under-whipped eggs | Beat eggs until thick ribbons form |
| Grainy chocolate | Overheated chocolate | Melt slowly at low heat or 50% power |
Flavor Variations to Try
- Salted Caramel Lava Cake: Place a teaspoon of thick caramel sauce in the center of the batter before baking
- Raspberry Lava Cake: Add a teaspoon of raspberry jam to the center for a fruity twist
- Espresso Lava Cake: Add 1 teaspoon of instant espresso powder to the batter for a mocha version
- White Chocolate Lava Cake: Substitute white chocolate for dark and reduce sugar by 20%
Conclusion
Chocolate lava cake is one of those desserts that looks incredibly impressive but is genuinely approachable for any home baker. The key is using quality ingredients — especially good dark chocolate — and nailing the timing. Make the batter ahead of time, refrigerate it in the ramekins, and bake fresh for guests while they are still at the dinner table. The oohs and aahs when they crack open that warm center are absolutely worth it.
Love chocolate desserts? Explore our recipe collection for classic chocolate mousse, no-bake chocolate cheesecake, and the best brownies you will ever make.
Frequently Asked Questions
Can I make lava cakes ahead of time?
Yes. Prepared, unbaked ramekins can be refrigerated for up to 24 hours. Add 2 to 3 extra minutes to the baking time if cooking from cold.
What chocolate should I use for lava cake?
Use high-quality dark chocolate with at least 70% cacao. Brands like Valrhona, Callebaut, and Lindt work beautifully. Avoid chocolate chips, which contain stabilizers that can affect texture and flow.
Can I use a muffin tin instead of ramekins?
You can, but ramekins give better results because of their depth and heat distribution. If using a muffin tin, reduce baking time to 8 to 10 minutes and grease very thoroughly.
How do I know when lava cake is done?
The edges should be fully set and the top should look matte. The center will still have a slight jiggle — that is exactly what you want. Trust the timing once you have calibrated it to your specific oven.